Test questions and question bank
Creating a case description and adding it to a question
Not just media files, but entire case texts can be added to questions. The advantage of a case text is that the candidate can view the text/image next to the question without having to scroll around or download files. Case texts have to be created first. After that, they can be added to one or more questions.
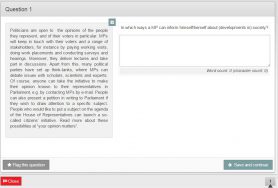
During an exam, a case text is displayed to the left of the question. Here is what it looks like in practice:
 A case text can also be displayed larger covering the full width. The answer field than is put below the case study.
-
Step 1
Create case description
- Log in to admin view and go to Questions.
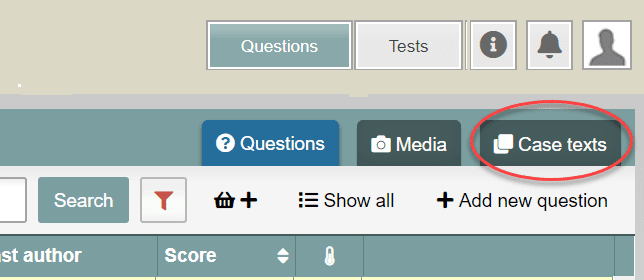
- In the top right of the screen, click Case texts.
- Then click Add case text.
- A text edit box will open. In this box, you can type or paste text and/or add a media file (like an image) using the Insert media file button.
- Click Save when your case study is complete.
- The case text has now been added to the ‘unused case texts’ category.
-
Step 2
Add case study to question
- Case studies are added to questions in the same screen where you edit the question.
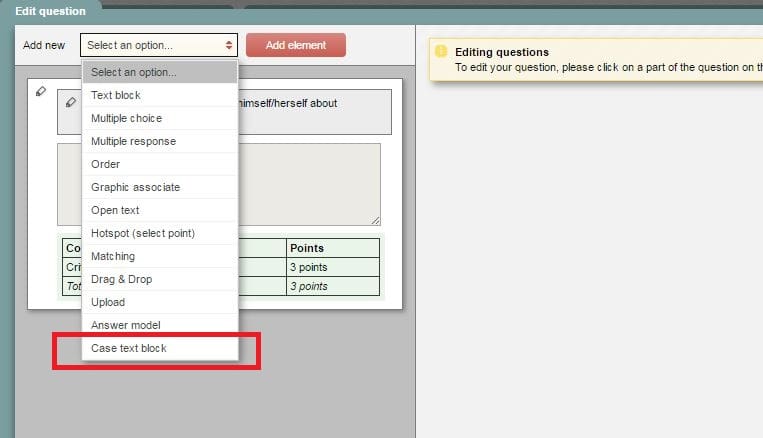
- In the top left of the screen (above the question and distractors), click ‘Select an option’ next to where it says Add new. A drop-down menu will appear. Select Case text block (see image).
- Then click Add element.
- A new screen will open. Select the case description you want.
- Select an unused case from the ‘unused case descriptions’ category. When a case description has been used before, you will find it in the category for your course. To add the case description, click Pick case study.
- The case description has now been added to the question.


