Manuals
Test terms and conditions
This page guides you through setting up Test Terms & Conditions for a test.
-
Step 1
- Go to the Administration environment > choose your course > go to Tests
- Choose ‘Add new test recipe’ > Settings > Administration settings
- Or: Click on an existing test recipe in the list > Settings > Administration settings
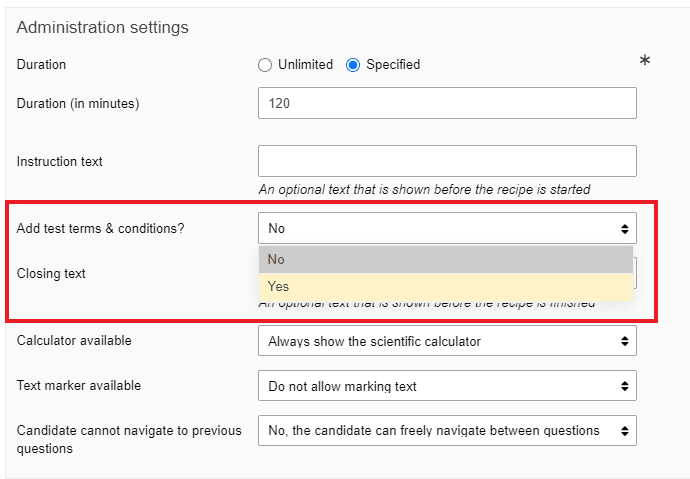
- In the screenshot you see an image of the ‘Exam settings’ field with the option ‘add test terms & conditions’
- Go to the Administration environment > choose your course > go to Tests
-
Step 2
- If you set ‘Add test terms & conditions’ to ‘yes’, a field will appear to add the test statements. See the following screenshot.
- You can now typoe the terms and conditions.
-
Step 3
Test terms & conditions from a student perspective.
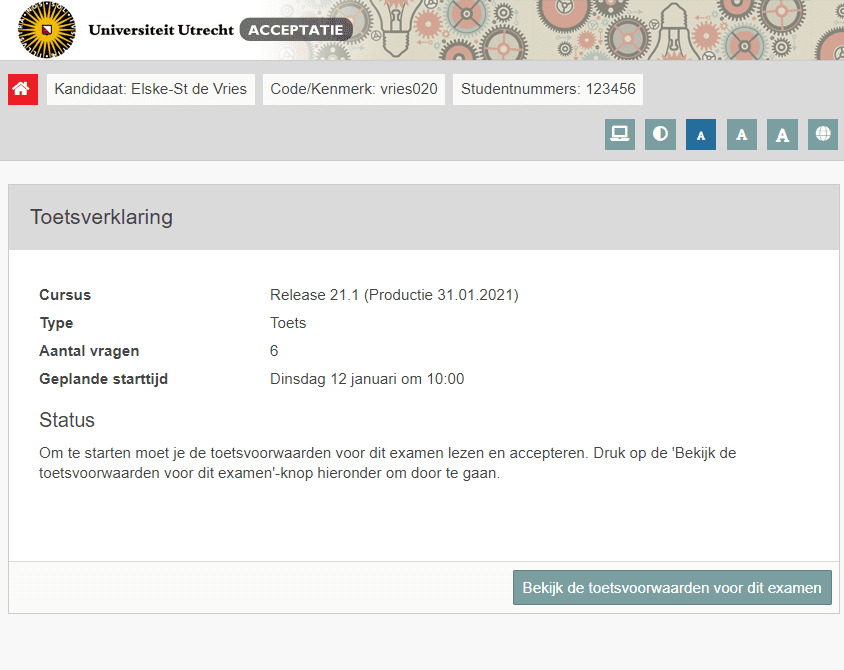
- When the student logs in to take the test, the following screen(shot) appears.
-
Step 4
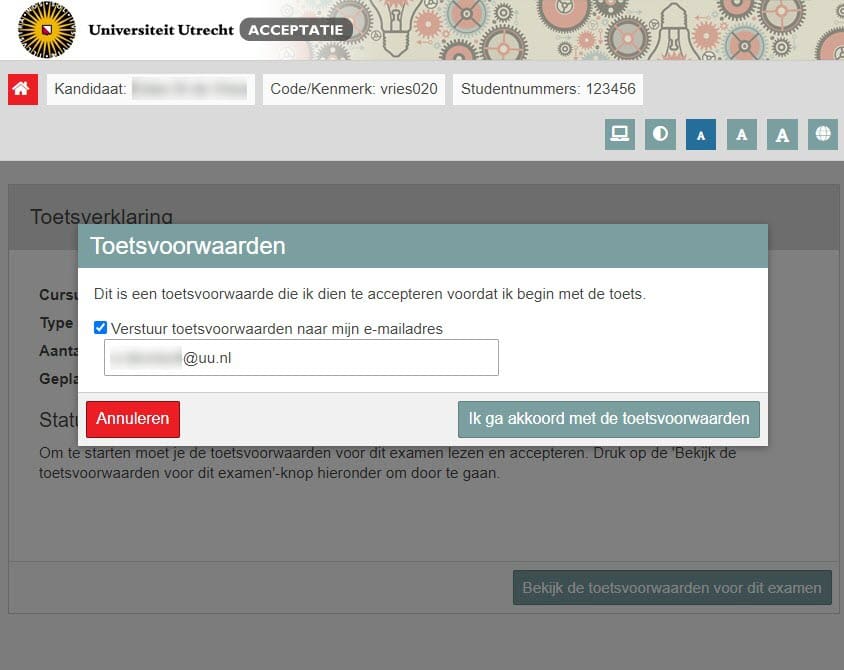
- The student has the option to send the test terms and conditions to his emailadress and cannot continue to the test without clicking “I agree with the test terms and conditions”.
- After approval, the student can start with the test (see the button: ‘Start test’).
-
Step 5
- If you choose to enter the test terms & conditions and you are done with that, follow all steps for creating/setting the testrecipe as usual.
- You can find these steps on the page Recipe: creating a recipe in ‘Tests’


